Main Dialog


Main Dialog |
|
This is the main dialog of pixafe earth
In the main dialog you get the main functions by using the das Menu, die Toolbar and die shortcuts. In the statusbar statusbar at the bottom of the main dialog details are shown about network connection state, world-coordinates and progress controls on current running actions.
The defaults can be set in the configuration .
After GPS-Coordinates Koordinaten are read the complete track can be shown with different details.
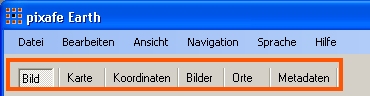
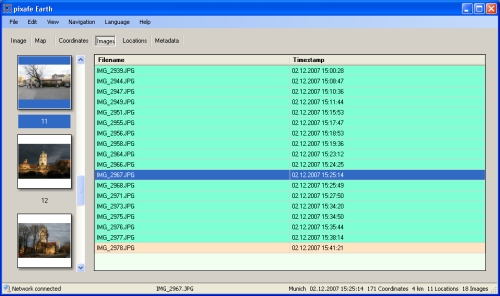
In the main dialog in different tabs the following information is shown:
The functions of the different views e.g. in context menus are explained below:
The Image-View shows a single image. The different Graphics operations are reached by the buttons in the toolbar.
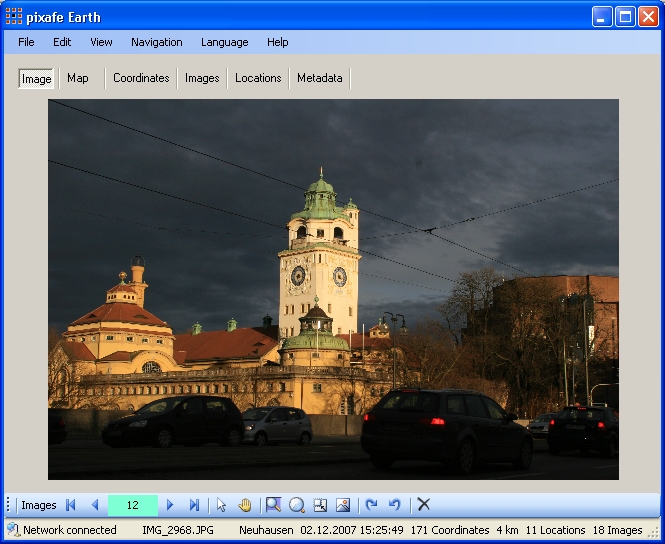
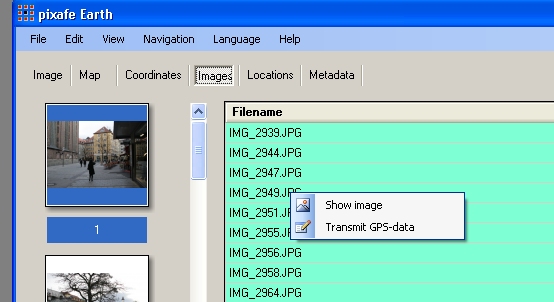
If you double click an image in the image table (Images View) or use the context menu to show the image you get into the Image view where you also can browse through all images by using the mittels toolbar. The coordinates to the images and locations are shown in the statusbar
For every image which has coordinates assigned, you can have a look at the exact position on the map view in different options: as normal map, sattelite image or hybrid which means sattelite image with streetnames as overlay.
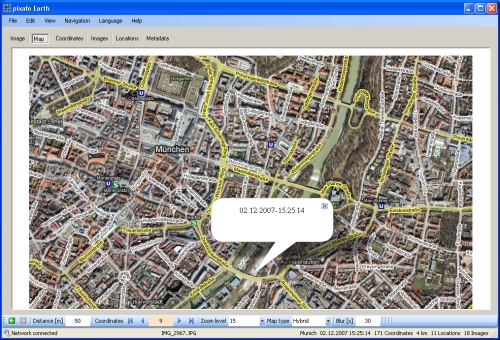
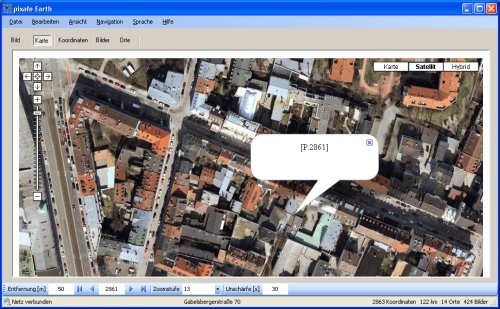
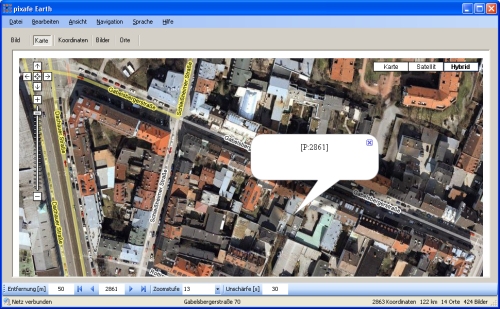
All maps can be moved with the mouse to see the continuation. The details can be advanced by using different zoom levels in the toolbar.
In the view coordinate the geo positions which have been read are shown. These coordinates derive from read GPS-files (*.log or *.gpx) or from images which had geo-information in their exif-infos. These geo-infos are shown in the coordinates table which also shows the time of the image. Coordinates of user defined locations are shown without time.
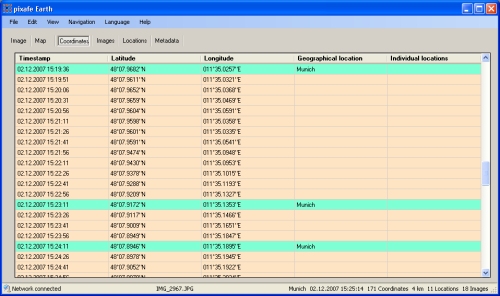
At the moment, when images and coordinates are read. the automatic mapping starts.
All the images to which coordinates are available are shown green, those which dont have a corresponding coordinate are shown red. As long as no mapping has been done the coordinates are all shown white.
After the mapping of images to coordinates the names of the locations are detected as long as a network connection is established.
When you double click a coordinate the applictaion changes to the view Ansicht-Map.
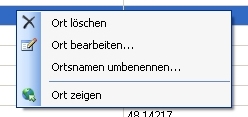
The context menu offers different functions:
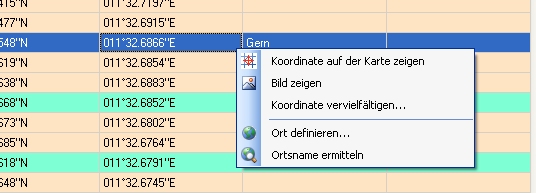
 | View the map according to the coordinate |
| View the image which was taken at the coordinate |
| Multiply a coordinate. For this use case a special dialog is shown. |
| Define location For this task the dialog location definition, is shown in which the properties of the new location can be entered. |
| The function Detect location is used to get the name of the location at the given coordinate. This option is only available at established network connection. |
In the images-view the names of the image files and thumbnails are shown. As with the coordinates table the time of the images is shown.
After mapping images and coordinates those are shown green which could be mapped and those which could not be mapped are shown red.
With the context menu you can show the image to each coordinate. The function transmit GPS-Data writes the gps-data and location name into the meta data of the image.
In the location-view all user defined locations are shown in a table.
An individual location is defined ba a name, the coordinate of the center and an ambit in meters. All images which are located in the circle of the user defined location are described with the name of the user defined location.

With the context menu you can see the map or sattelite image to every location. You can edit the location, rename or delete it.
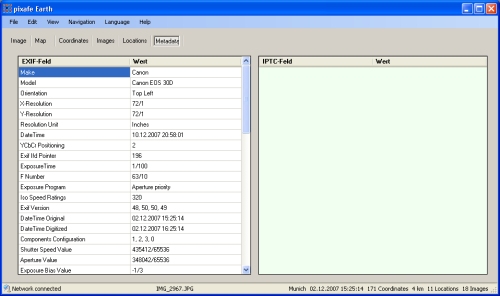
This view shows the meta data of the image in two tables.
|